
Kimchi, Napa Cabbage 배추 김치
Equipment

1 Gloves
Buy Kimchi Ingredients Here.
Ingredients
*The default serving of this recipe is set to 1. For this recipe, 1 servings refer to about 1 whole 4 lb napa cabbage.
For Brining
- 1 Napa Cabbage about 4 LB size
- 1 quart Water for brining solution
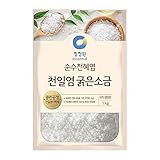
- 1/2 cup Coarse Sea Salt for brining solution
- 1/4 cup Coarse Sea Salt for sprinkling
For Seasoning
- 1.5 TBS Sweet Rice Flour can use regular flour
- 1/4 cup Water To mix with sweet rice flour
- 1.5 cup Water To boil
- 60 g Garlic Minced. 60g = about 15 cloves
- 9 g Ginger Minced.
- 1/4 Asian Pear Minced. Substitute with bosc pear but use 1/2 instead of 1/4
- 6 TBS Salted Shrimp Sae-woo-jeot (새우젓). Buy Korean produced one if possible
- 3 TBS Anchovy Fish Sauce Meol-chi-jeot (멸치젓). Buy Korean produced one if possible
- 100 g Gochugaru, Coarse Grind Korean Chili Pepper Flakes. Our kimchi is spicy but super good. If you must, you can reduce the gochugaru by 10-20%
- 4 tsp Sugar Can substitute with sugar substitute
- 0.5 TBS Coarse Sea Salt Taste and add as much as needed
- 10 roots Green Onion
- 400 g Korean Radish Cut into a little over 1/8" sticks
- Water Only if seasoning is too thick


Instructions
Prepare & Brine Napa Cabbage
- Make a 3-inch incision in the middle of the cabbage at its base. For the traditional method, you don’t have to wash the cabbage in the beginning unless it's super dirty since it will be thoroughly washed after the brining process.

- Use your hands to break the cabbage in half.

- Make a 2-inch incision at the end of each half. You can either break into quarters here or do it after brining and washing is done. In the video, we quartered it in the beginning.

- Make salt solution. 1 part salt, 8 part water. Must use coarse sea salt. Filtered water is best but tap water works OK.

- Submerge a cabbage piece in the salt water ensuring all parts of the cabbage are wet. Take it out of the water and set it aside. If you are making 1 cabbage, there won't be enough water to submerge the cabbage. So you can try to wet every part of the cabbage by placing it in the bowl and pouring the solution over it with a cup as shown in the video. Repeat the same process with all cabbage pieces. Don't throw out the brining solution.
- Sprinkle salt on each each layer of the cabbage pieces, focusing mainly on the white stems. Start from the bottom layer and go through each layer. Then repeat for each cabbage piece. We used 1/4 cup of salt for the WHOLE 4 lb nappa cabbage (1 TBS for each quarter) for 24 hour brining. If you use more salt, it will be brined faster. (e.g, double salt -> 10 hour brine but varies depending on the salt and temperature)

- The white stems need more salt because of their thicker texture. The leaves will soften quickly, while stems take more time.

- Place all cabbage pieces in a large bowl or roasting pan, cut side facing up and in one or two layers.
- Pour any left over brining solution around the edges into the bowl.
- Then, cover with a lid or cling wrap and let it sit at room temperature.
- After 3-4 hours, rotate the top and bottom cabbages. After 6-8 hours from the beginning, rotate the top and bottom again and flip the cabbages so the cut part is facing the bottom. As time passes, more liquid will form at the bottom. Leave the liquid as is.
- You can keep rotating every 3-4 hours. Try to move it around so thick white stem parts are in the liquid more than the think green parts as it will take longer for white part to be brined.
- We brined for 24 hours but depending on the amount and type of salt you use, it can be anywhere from 10 to 24 hours. Also, the colder it is, the longer it will take and the hotter it is, the faster it will be brined.
- When all the parts of the cabbage is easily bent, the brining is done. Then thoroughly wash the cabbages 3 or more times. If it's too salty after washing, you can soak in water and wash more until desired saltiness. It's better to be over brined than under because you can always fix over brining by soaking in water. After washing, it should take a little bit saltier than you'd like as it ferments saltiness will be reduced a bit.

- Drain all the water out by placing the cabbage upside down in a strainer for 2 to 5 hours. Not draining properly could result in undesirable flavors. There should be some space between the bottom of the strainer and the surface of the sink so the water can escape.


Make Filling
- Make flour paste by mixing flour and water and boiling. For 1 cabbage, boil 1.5 cup of water in a small pot. In a small bowl, mix 1.5 TBS of sweet rice flour and 1/4 cup of cold water. Then, as soon as the water boils, lower the heat to low-medium. Then, add the flour water mix into the boiling water while continuously stirring. Let it continued to cook for a few more minutes while stirring until it becomes slightly thickened. Take it off the heat and let it cool until it becomes lukewarm.

- Add coarse gochugaru into the cooled flour soup and mix well. Do not add to hot flour soup as it will ruin the flavor. OPTIONAL: After adding gochugaru, leave it for about 30 minutes to get a more vibrant color.

- Grind pear, garlic and ginger together. Pick out solids from salted shrimp and mince with a knife. Do not throw out liquid from the salted shrimp.
- Mix gochugaru and flour soup with pear, garlic, ginger, minced salted shrimp with its liquid and anchovy fish sauce.
- Taste and add more sea salt as needed. If the seasoning is too thick, you can add a little water. You can store this seasoning in the fridge overnight to bring out deeper flavor but is optional. You can also freeze the seasoning at this stage and thaw and use it in the future.
- Wash and cut green onions into 1/2 ~ 1" pieces.

- Wash and peel the radish and cut it into strips. (a little over 1/8" inches thick)

- When the cabbage is fully drained, combine seasoning with cut green onions, and radish and let the radish wilt in the seasoning for about 30 minutes.


Apply Seasoning
- Put on the disposable gloves to protect your hands. Place each cabbage quarter on a large tray and apply seasoning mix in between the leaves. Go through each layer leaving some chunks of radish and green onions in the white stem part so they don’t fall out.

- Once seasoning is applied to all the layers, hold the cabbage quarter in your hand and rub some seasoning on the outside.

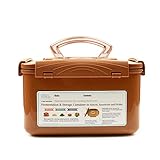
- Place in a container with a good seal. Once the container is filled, use your hand to pat down on kimchi so that it is tightly packed in the container. Fill the container about 80% or less; otherwise, it can overflow as kimchi produces liquid and gas while fermenting. You can use any glass jar or high quality plastic container, but for best results, use our Crazy Korean Cooking Kimchi Container which induces probiotic fermentation and keeps the kimchi at an optimal condition. It also keeps the smell in very well.


Fermenting
- Cover the top with a plastic sheet (cling wrap) and close the lid. If you are making a small amount and will be eating it in a week or two, you don’t have to cover with a plastic sheet. The plastic sheet keeps the air out so it reduces a chance of getting molds.Or If you are using our Kimchi Container, simply insert the inner vacuum plate until it meets the cabbage. Close the plug. Then, close the outer lid. If the fermentation is excessive and the inner plate keeps getting pushed up, you can leave the plug open until it goes in the fridge.

- Leave it out at room temperature (approx. 70 °F or 21 °C) for two days to get the fermentation going. *At a high temperature, it will ferment faster. The more it ferments, the sourer the flavor gets.
- After 2 days at room temperature, keep it in the fridge for slow fermentation. Kimchi lasts for months when refrigerated. However, it's best to consume within 1-3 months. Every time you take out kimchi, pat down the rest in the container, to prevent molds. Once the kimchi gets too sour to eat, you can make delicious kimchi fried rice and kimchi stew with it.

Serve
- To cut kimchi for serving, take one quarter out of the container. Cut once down the middle lengthwise.

- Cut across both halves multiple times to create bite size pieces. The end of the cabbage is not served, but it can be saved to be used in kimchi stew or kimchi soup.

- Using the side of the knife, carefully lift the sliced kimchi and move onto the serving plate so that the layers are beautifully presented. You can pour some kimchi juice on top to keep it moist.

- Serve cold as a side dish. Enjoy!


Notes
Good to Know
Kimchi is a must-have side dish that appears in almost every Korean meal. "Kimchi" is the generic Korean name for pickled vegetables. When Koreans say "kimchi," they usually refer to spicy napa cabbage kimchi, since napa cabbage is the most common vegetable used in making kimchi. For other variations, people usually specify the vegetable name before the word “kimchi” (e.g., "O-ee Kimchi" means Cucumber Kimchi and "Chong-gak (Bachelor) Kimchi" means Ponytail Radish Kimchi). Kimchi is also used as an ingredient for many other Korean dishes. If you are new to kimchi, you may be repelled at first by its strong smell and unique taste. Once you get used to it, however, you will most likely become addicted. This may not be a bad thing, since kimchi is also famous for its health benefits. It is rich in fibre, vitamin A, vitamin C, thiamine (B1), riboflavin (B2), calcium, and iron, and also contains many beneficial lactic acid bacteria. Some researches say that kimchi is great for digestive health, lowering cholesterol, fighting cancer, anti-aging and for an immunity boost. One can easily find pre-made kimchi in Korean markets. But you can certainly make your own as well, and you can make it to fit your personal taste and spiciness preference. The quality of sea salt and gochugaru (Koran hot pepper flakes) is key to making great kimchi. Many Koreans use 100% Korean produced sea salt and gochugaru to make best quality kimchi even though the price is much higher than products from china or other countries. Optional Ingredients and Substitution-Minari is optional.
-Some Korean like to add raw oysters to their kimchi. If you are new to Kimchi, we recommend not using raw oysters since it adds distinct flavor that you may not like. Other raw seafoods such as squid and fish can be added as well. If you are adding seafood, make sure it’s fresh since you have to add it raw. Clean them in salt water thoroughly and drain completely. Mix with some seasoning. Then, embed one or two pieces in each layer. It's better not to add raw seafood if you are making a big batch of kimchi and want to keep it for months. Salted Shrimp: Salted shrimp can be found in the refrigerated or freezer section of Korean markets. If you can't find locally, you can try https://www.kevinschoices.com (they ship nationally) or Hmart online. Store salted shrimp in the freezer to keep it for a long time since only a small amount is used at a time. Due to its saltiness, it doesn't freeze solid so you can use it anytime without thawing. Using only salted shrimp or a mix of salted shrimp and anchovy fish sauce results in refreshing and clean taste for this kimchi. However, some Koreans, especially in the southern Korea, use anchovy sauce only. Fish Sauce: You can use different proportions of Anchovy Fish Sauce and Salted Shrimp (Shrimp Fish sauce), depending on your preference. In southern parts of Korea, people use more anchovy fish sauce. I find using too much anchovy fish sauce makes kimchi too fishy and bitter. Other types of fish sauce are used in different parts of Korea, but shrimp and anchovy fish sauces are the most common. Amount of Kimchi
The default serving amount of this recipe calls 1 napa cabbages. Usually ¼ napa cabbage is good for a meal for 8-10 people.
(1 large napa cabbages = 32 - 40 servings. If 2 people eat kimchi once a day, it will last 2-4 weeks.) Use rubber gloves!
Use clean food-safe rubber cloves for brining cabbages and applying seasoning. Otherwise, your hands will sting from salt and chili peppers. Brining Kimchi Brining time may vary depending on the temperature, the amount of salt and the type of napa cabbage used. In summer, brining time is shorter, In winter, it gets much longer. How do you know if the brining process is done? When you bend a leaf of the napa cabbage backwards, it should be bent without breaking or resistance. After rinsing 2-3 times, it should saltier than the desired saltiness. The saltiness decreases during the fermentation process. If there is too much salt, the napa cabbage will lose the sweet taste. If there is too little, your kimchi will taste really bland. Also, if it’s not brined long enough, it can taste bitter or rot instead of being properly fermented. Don't fret! After a few trials, you will get it! Coarse sea salt is key to good kimchi. Table salt would not give you the same flavor and texture. Kimchi Seasoning Leftover
If you have made more seasoning than you need, you can freeze the seasoning (the seasoning before you add radish and green onions preferably). When the next round of kimchi comes around, thaw the seasoning in the fridge overnight and use it. Frequently Asked Questions Do I have to use Coarse sea salt ?
You can use kosher salt. But, coarse ones are better than fine ones. If the particles are too small, it may speed up the brining process too much that the texture of kimchi may not be as crispy.
We don’t recommend using table salt (iodized salt) because iodine prevents fermentation and the texture and the color of kimchi may not turn out right.
You can buy coarse sea salt from local Korean market. How long should I ferment kimchi for?
Fermentation time depends on temperature and the amount of salt in the kimchi. A lower temperature and smaller amount of salt will make the fermentation process slower. They say slowly fermenting kimchi at 5-10℃ (41-50°F) for 15-20 days results in the most tasty kimchi. The duration of fermentation also depends on your personal preference. Some people like fresh (almost unfermented) kimchi. Some like it very fermented and sour. I personally like my kimchi fermented to medium sourness. I leave it out in room temperature for 2-3 days. The best way is to leave it out and taste it every day. When it reaches your preference, put it in the refrigerator. If you made a large amount, you can leave some out and store the rest in the fridge right away. Then, take some out later for more fermentation as needed. Remember that kimchi will produce gas and liquid as it is fermented. Leave some room in the container, or it will overflow. How should I store my kimchi and how long does it last?
Traditionally, kimchi was stored in earthenware called "Ong-gi." Ong-gi (Onggi) is breathable pottery that keeps kimchi and other fermented foods in an optimal condition. In the old days, Koreans used to make kimchi in the fall, then place it in an ong-gi and bury the ong-gi underground to keep the kimchi throughout the winter. Today, most Koreans use kimchi container to store Kimchi, and keep the containers in a specialized Kimchi fridge. Kimchi fridges keep kimchi at an optimal temperature, and keeps your regular fridge free of the potent kimchi smell. You can buy a specialized kimchi container here. If you don't have any of the above, place the kimchi in a tightly sealed container and keep in the fridge. See below to learn how to prevent kimchi from getting moldy. Kimchi can last 6 months or longer in the fridge but it may get sour in taste. Sour kimchi is perfect for making kimchi stew, kimchi pancakes, kimchi fried rice, etc. If you add fresh seafood such as oyster to kimchi, it's better to consume the kimchi within a month. I got white mold on my kimchi. Is that normal? What should I do?
Getting molds on kimchi is not ideal. This can happen when kimchi is directly exposed to air as it's fermenting. When you place kimchi in a container, make sure you press down firmly to get rid of any air between kimchi. (Do this every time you take out kimchi from a container that contains a large amount of kimchi.) Then, cover the top with a plastic sheet or saran wrap before closing the lid. Finally, make sure the lid is on properly. To make this easy, you can buy a specialized kimchi container instead. Another reason for mold to appear is that you don't have enough salt or kimchi sauce/seasoning for the cabbages. We all know salt preserve things. They say white mold is not harmful. So if it's only on the very top, you can get rid of the top layer and save the rest of the kimchi. But if you don't want to take a risk, you may want to use the rest for cooking stew, soup or fried rice. If you get different colored (green or black) mold, it's definitely bad for you. Why go through the hassle of making kimchi with a whole napa cabbage instead of pre-cutting it?
There is a type of kimchi made with pre-cut cabbages called “Mak-kimchi.” Mak-kimchi is made to be eaten quicker and it does taste slightly different from regular kimchi (although some people may not be able to tell the subtle difference.) There are at least 3 benefits of making kimchi with an uncut cabbage:
1. Making kimchi with whole (uncut) napa cabbages minimizes direct exposure to air which helps kimchi stay tasty for a longer period of time.
2. When the cabbages are pre-cut, the seasoning is absorbed into the cross section immediately and decreases the delicious and unique fermented taste.
3. When the kimchi is cut afterward, it allows a better presentation. It also shows that Kimchi is freshly taken out and has not been served to anyone else (i.e., it’s not a leftover that was served in previous meals). Do you have to cut kimchi when serving?
In general, kimchi is cut when it is served as a regular side dish. However, sometimes the leaves are left long when kimchi is served to wrap rice and meat. When you cut kimchi for serving, cut once down the middle the long way. Then, cut across both halves multiple times to create bite size pieces. Carefully move the sliced kimchi onto the serving plate so that the layers are beautifully presented.
Tried this recipe?Let us know how it was!


